Channel Drains Vs French Drains (A No Nonsense Comparison)

If you’ve been dealing with standing water around your home, there’s a good chance you’ve come across both channel drains and French drains. 

At first, they can sound pretty similar. 

Both move water away from your property, both help prevent flooding, and both can save you from expensive water damage down the road.

Still, they work in completely different ways.

Picking the wrong one can leave you with the exact same drainage problem a few months later, except now you’ve spent money on a system that doesn’t really fix anything.

In this post, we’ll compare channel drains vs French drains to help you decide what to get.

#1 Purpose

The main purpose of a channel drain is to collect and move surface water fast. 

Think about water rushing down a driveway during a storm or puddles forming across a patio. A channel drain grabs that water before it has a chance to spread everywhere.

A French drain has a completely different job. 

It handles water trapped in the soil. Instead of catching water on top of the ground, it redirects underground moisture away from problem areas like foundations, basements, retaining walls, and soggy yards.

So right away, the biggest difference comes down to where the water problem starts.

If the issue happens on the surface, a channel drain usually makes more sense. 

If the ground stays soaked for days after rain, a French drain is often the better fit.

French Drain Vs Channel Drain

Also Read: French Drain Alternatives

#2 Installation Location

Channel drains are installed directly into hard surfaces. You’ll commonly see them in:

  • Driveways
  • Pool decks
  • Garage entrances
  • Patios
  • Walkways

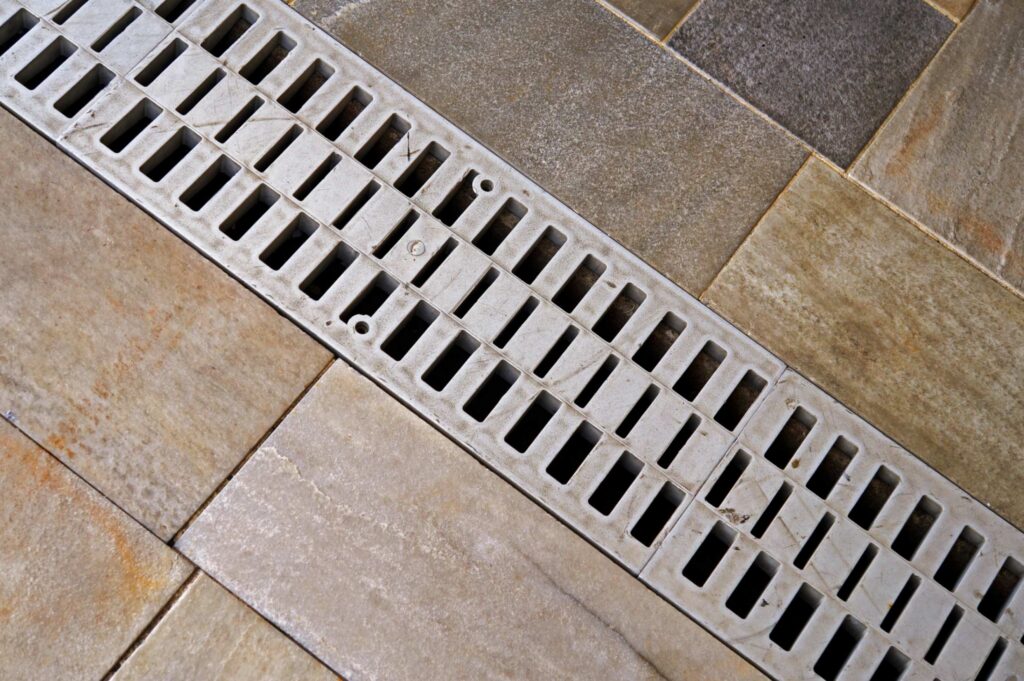
They sit flush with the surface and usually have a visible grate running across the drain.

French drains are buried underground. 

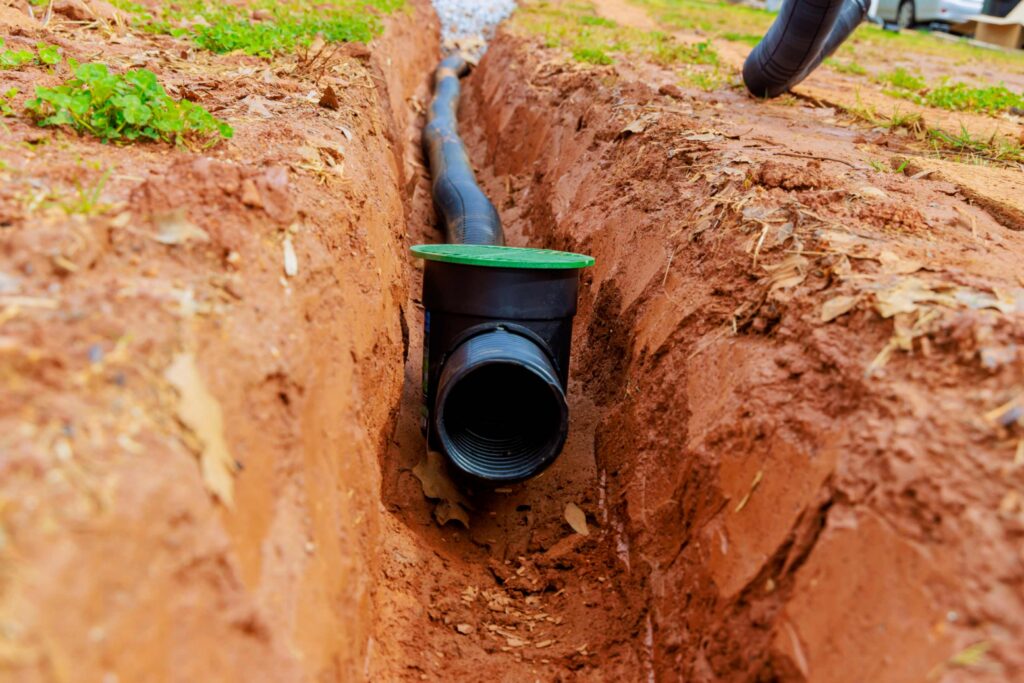
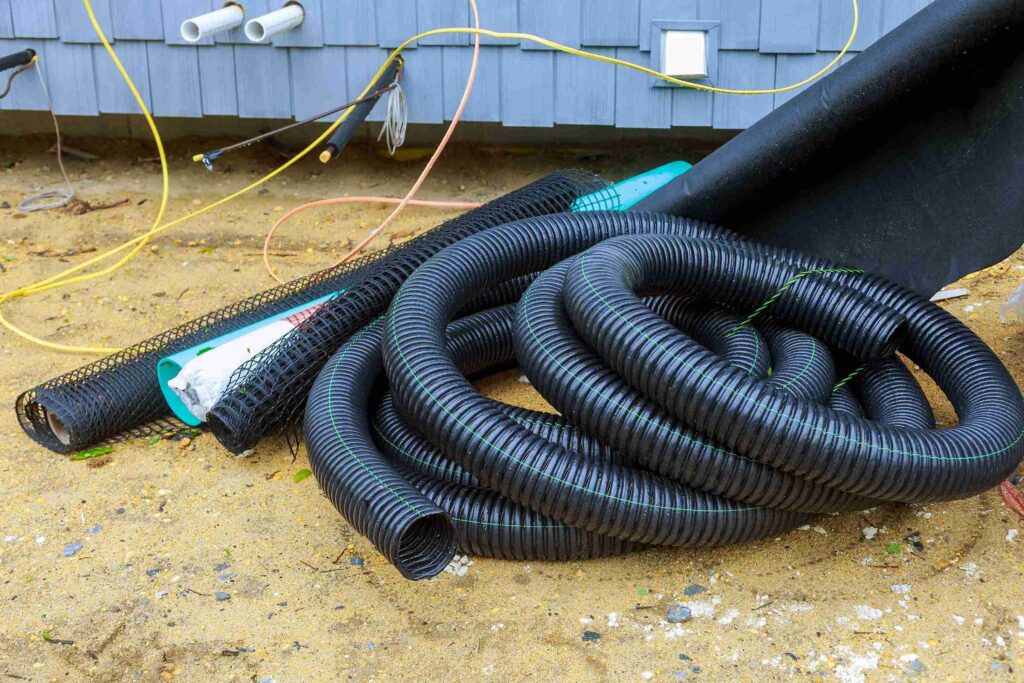
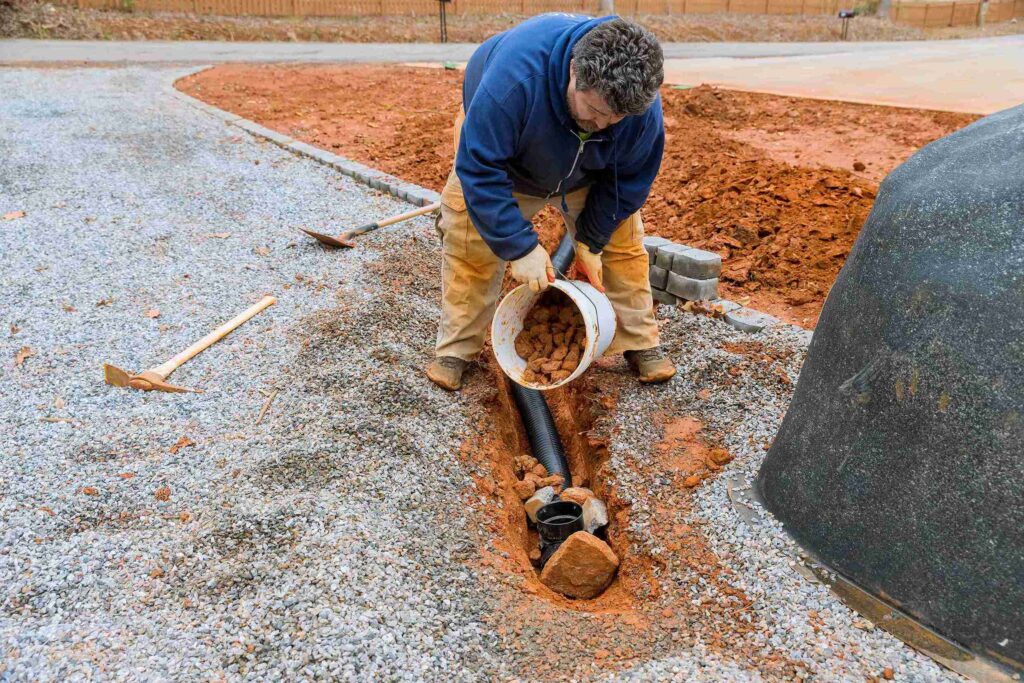
Contractors dig a trench, add gravel, install a perforated pipe, then cover everything back up. Once completed, you may barely notice it’s there.

French drains often go around foundations, across wet parts of a yard, near retaining walls, or along slopes where water naturally collects.

#3 Drain Design

The designs are pretty different once you look at how each system works.

A channel drain is basically an open trench with a grate on top. Water flows into the trench and moves through pipes toward a drainage outlet.

A French drain is more like an underground filter system. 

Water seeps through gravel into a perforated pipe buried below the surface. The pipe then carries the water away from the area.

One system catches water directly. The other slowly collects moisture from the surrounding soil.

That’s why channel drains react quickly during heavy rain, while French drains work more gradually over time.

Also Read: Geotextile Fabric For French Drain

#4 Best Applications

Channel drains work best in places where water moves across hard surfaces quickly. They’re especially useful in areas where standing water creates slipping hazards or starts pooling near buildings.

French drains shine in areas with poor soil drainage or chronic moisture issues like wet lawns, basement protection, foundation drainage, retaining walls, hillside drainage

In some cases, homeowners actually use both systems together. 

A driveway may use a channel drain while the backyard relies on a French drain to handle underground moisture.

#5 Appearance

Appearance may not seem like a huge deal at first, but it matters once the installation is done and you’re staring at it every day.

Channel drains stay visible. 

The grate remains exposed because that’s how water enters the system. Some modern grates look sleek and blend nicely into concrete or pavers, though you’ll still notice them.

French drains are mostly hidden underground. 

Should I Get A French Drain Or Channel Drain

After installation, the area may look almost completely normal again, especially after grass grows back over the trench.

If you want the drainage system to stay mostly out of sight, French drains usually win in this category.

#6 Maintenance Requirements

Every drainage system needs some level of maintenance. 

Ignore them long enough and eventually problems show up.

Channel drains need regular cleaning because leaves, dirt, mulch, and debris can collect inside the grate. 

Thankfully, cleaning them is usually pretty simple. You remove the grate, clear out the blockage, and flush the drain if needed.

French drains are lower maintenance day to day, but repairs can become more difficult if something goes wrong underground. Roots, sediment buildup, or crushed pipe sections can create drainage issues over time.

The good part is that a properly installed French drain can go years without major attention.

#7 Installation Cost

Channel drains are often cheaper for smaller projects, especially during new construction or patio installation. Since the drain installs directly into concrete or pavers, labor tends to stay more manageable in straightforward setups.

French drains can get expensive pretty quickly because they involve excavation, gravel, piping, trenching, and landscaping repairs afterward. 

The deeper the trench and the larger the drainage area, the higher the cost climbs.

In general, French drains usually cost more for large residential drainage projects.

#8 Lifespan

French drains typically last longer than channel drains.

Channel drains made from quality materials can easily last decades, especially if the grates stay clean and water flows freely.

French drains can last for about 30 – 40 years, though it depends on the quality of installation. Good filter fabric, proper gravel placement, and solid pipe installation help prevent clogs and premature failure.

Cheap installations tend to fail much sooner because soil and debris slowly work their way into the pipe system.

Also Read: How To Unclog A French Drain

Should I Get A French Drain Or Channel Drain?

This really comes down to the kind of water problem you’re dealing with.

If water rushes across a hard surface and creates puddles around concrete areas, a channel drain is probably the better choice. It’s built specifically for fast surface runoff.

If your lawn stays muddy, your basement feels damp, or water builds up around the foundation after rain, a French drain usually makes more sense because it handles underground moisture.

Some properties benefit from using both systems together since surface water and groundwater problems can happen at the same time.

The biggest mistake people make is choosing a drain based on price alone instead of identifying where the water is actually coming from.

Bottom Line

The main difference between a channel drain and a French drain is that a channel drain is better for collecting fast-moving surface water. Plus it’s usually easier to clean and often cheaper for smaller projects. 

A French drain, on the other hand, is better at handling underground water, staying hidden from view, and solving long-term soil drainage problems. Plus, they last longer.

Dry Well Without Container (Is It Possible?)

If you’ve been dealing with puddles in your yard or water dumping out of your gutters and going nowhere fast, you’ve probably come across the idea of a dry well. 

Then you start looking into it and suddenly everything involves plastic tanks, barrels, or expensive kits.

So naturally, the question comes up: can you skip all that and just keep things simple?

Short answer: yes, you can. And in a lot of cases, it works just fine. But like most DIY drainage fixes, the details matter more than people expect.

In this post, we’ll explain if you can build a dry well without a container.

Can You Build A Dry Well Without A Container?

Yes, you can build a dry well without using any kind of container. The container setups you see online are really just a more structured way to do that. They’re not required.

A container-free version is basically a hole in the ground filled with gravel or crushed stone. That’s it. Water flows in, spreads through the gaps in the stone, and gradually drains into the surrounding soil.

It’s a simpler approach, cheaper, and honestly a lot easier to build if you’re doing it yourself over a weekend.

Also Read: Great Dry Well Alternatives

Can You Build A Dry Well Without A Container

How A Container-Free Dry Well Works

Think of this like creating an underground sponge made out of rock.

When water comes in (usually from a gutter downspout or a low spot in your yard) it enters the pit you’ve dug. Instead of sitting there and turning into a muddy mess, it filters through layers of gravel. 

Those little air pockets between the stones give the water space to spread out.

From there, gravity does the rest. The water slowly seeps into the surrounding soil over time.

If you line the hole with landscape fabric before adding gravel, it helps keep dirt from washing in and clogging everything up. 

That one step makes a big difference in how long your dry well actually lasts.

It’s simple, but it’s effective when the conditions are right.

When A Dry Well Without Container Makes Sense

This kind of setup shines in pretty specific situations, and when you hit those conditions, it’s hard to beat for the price.

It works best when you’re dealing with smaller drainage problems. 

Think gutter runoff from a typical house, or that annoying soggy patch in the yard that shows up after every decent rain. If the volume of water isn’t overwhelming, a gravel dry well can handle it.

If your yard drains reasonably well (something like sandy or loamy soil) you’re in good shape too. 

Water will soak in at a steady pace, and the system won’t get overwhelmed.

It’s also a great option if you just want a straightforward DIY project without buying specialty parts. No complicated installs, no fitting pieces together. Just digging, lining, and filling.

Also Read: Sump Pump Discharge Ideas

When It Might Not Work Well

Now for the flip side, because this isn’t a magic fix for every situation.

If your soil is heavy clay, you’re going to run into problems. 

Clay doesn’t absorb water very well, so instead of draining, water just sits there. In that case, your dry well turns into more of a holding tank than a drainage solution, and eventually it backs up.

Pros And Cons Of A Dry Well Without Container

Another issue is volume. If you’ve got a large roof pushing out a ton of water during storms, or your yard tends to flood regularly, a simple gravel pit might not keep up. 

It doesn’t have the storage capacity of a structured system.

Over time, there’s also the risk of clogging. 

Dirt, debris, and sediment can slowly work their way into the gravel and reduce how well it drains. That doesn’t happen overnight, but it’s something to keep in mind.

Pros And Cons Of A Dry Well Without Container

Here’s a look at the pros and cons of building a dry well without a container:

ProsCons
Low cost and budget-friendlyCan clog over time
Easy DIY installationHolds less water than container systems
No need for special materialsNot ideal for clay soil
Flexible size and shapeMay require occasional maintenance

Also Read: Can You Do A French Drain Without Pipe?

Tips to Make It Last Longer

If you’re going to build one of these, here a few small decisions can make a big difference in how well it holds up over time:

  • Use clean, washed gravel instead of dirt-covered stone. That alone helps prevent early clogging
  • Always line the hole with landscape fabric to keep soil from mixing in
  • Try to keep leaves and debris out of the system, especially if it’s connected to a downspout

Beyond that, placement matters more than people think. Keep the dry well a good distance from your home’s foundation so water isn’t draining right back toward it. 

And if possible, put it in a naturally lower area of your yard where water already wants to go.

A little planning upfront saves a lot of headaches later.

Alternative Options To Consider

Sometimes a gravel dry well just isn’t enough, and that’s fine. There are a few other routes you can take depending on what you’re dealing with:

Plastic Dry Well Kits

These are the more “official” version of a dry well. 

They use plastic chambers or barrels that hold water and release it slowly into the ground. 

They handle larger volumes better and tend to last longer with less maintenance, but they do cost more and take a bit more effort to install.

Also Read: Geotextile Fabric For French Drain

French Drains

A French drain is more about moving water than storing it. It uses a perforated pipe buried in gravel to redirect water away from problem areas. 

If your main issue is water collecting in one spot, this can be a really effective solution.

Rain Barrels

If you like the idea of putting that water to use instead of just sending it into the ground, rain barrels are worth a look. They collect runoff from your gutters so you can reuse it for watering plants, lawns, or even cleaning outdoor areas.

Bottom Line

You don’t need a container to build a working dry well. A simple gravel-filled pit can handle small to moderate drainage problems and is one of the easiest DIY fixes out there.

That said, it’s not the right solution for every yard. Soil type, water volume, and placement all play a role in how well it performs. 

Get those lined up, and it can work surprisingly well. Ignore them, and you’ll be back to dealing with puddles again.

If your situation is on the lighter side, this is a solid, no-frills option that gets the job done without overcomplicating things.

8 Good French Drain Alternatives

If you’ve been dealing with standing water in your yard, you’ve probably come across French drains as the go-to fix. 

And yeah, they work, but they’re not always the easiest or cheapest option. Digging trenches, laying pipe, hauling gravel… It’s a whole project.

The good news is you’ve got other ways to handle drainage that can be just as effective, and in some cases, way more attractive. Some of these options blend right into your landscaping, so you’re fixing the problem without making your yard look like a construction zone.

In this post, we’ll go over eight great french drain alternatives.

#1. Swales

A swale is basically a shallow, gently sloped ditch that guides water away from where you don’t want it. 

That’s it. Nothing fancy, but surprisingly effective.

Instead of water pooling up in one spot, a swale nudges it along to a better location – like the edge of your yard or a drainage area. 

alternative to french drains

The nice part is that it doesn’t look like a ditch once it’s finished. 

You can cover it with grass or even plant it, and it just blends in.

Swales work best in yards that already have a slight slope. If your yard is completely flat, you might need to do a bit of shaping to make it effective. Still, it’s one of the simplest fixes out there and doesn’t require a bunch of materials.

Also Read: How To Unclog A French Drain

#2. Dry Creek Beds

If you want something functional that also looks really good, this is where dry creek beds shine.

Picture a shallow trench filled with rocks and gravel, designed to look like a natural stream. 

When it rains, water flows through it instead of spreading across your lawn. When it’s dry, it just looks like part of your landscaping.

This french drain alternative is great for redirecting runoff, especially if water tends to move in a certain direction already. You’re basically giving it a defined path and making it look intentional.

One thing to keep in mind: it’s not built for heavy drainage right next to your foundation. It’s more about guiding surface water than handling serious saturation.

#3. Rain Gardens

Rain gardens are french drain substitutes that feel almost too nice to be practical, but they actually do a great job.

You create a slightly lower area in your yard and fill it with plants that thrive in wet conditions. 

When it rains, water collects there and slowly soaks into the ground instead of sitting on the surface or running toward your house.

Here’s what makes them appealing:

  • They look like a garden, not a drainage fix
  • They help filter runoff naturally
  • They support pollinators and local plants

Rain gardens are best for moderate drainage issues. If you’ve got serious flooding, you’ll probably want to combine this with something else. 

But for everyday runoff and soggy spots, they’re a really nice option.

#4. Dry Wells

A dry well is a bit more hidden, but it’s one of the closest alternatives to a French drain in terms of function.

It’s an underground structure that collects water and then slowly releases it into the surrounding soil. You can connect it to downspouts or place it in areas where water tends to gather.

Also Read: Dry Well Alternatives

From the surface, you wouldn’t even know it’s there. Everything happens below ground, which makes it great if you don’t want to change the look of your yard.

Dry wells are especially useful when you’re dealing with concentrated water, like runoff from your roof. Instead of letting that water spill out and cause problems, you’re giving it a place to go.

#5. Yard Grading (Re-Sloping The Land)

Sometimes the issue isn’t that your yard can’t drain, it’s just draining in the wrong direction.

If water is flowing toward your house, that’s a grading problem. Fixing the slope so water moves away from your foundation can solve the issue at its source, instead of trying to manage it after the fact.

french drain substitutes

This can be as simple as adding soil to create a gentle slope, or as involved as reworking a larger section of your yard. It depends on how bad things are.

It’s not the quickest fix, but it’s one of the most effective long-term solutions. 

Once the slope is right, a lot of drainage problems just… stop happening.

#6. Terracing (For Sloped Yards)

For those of us living on a hill, water can become a destructive force that washes away mulch and carves deep ruts in the dirt. 

Terracing is the art of turning a steep slope into a series of flat steps. 

You can use wooden timbers, stone blocks, or even poured concrete to build low retaining walls. 

These “steps” break the fall of the water, slowing it down so it doesn’t gain the speed and power to cause erosion.

Also Read: Geotextile Fabric For French Drain

By slowing the water down, you give it more time to soak into the soil at each level. Plus, those flat sections are perfect for planting vegetables or flowers.

It’s a bit of an investment in materials, but it’s one of the most permanent and effective ways to manage water on a grade.

#7. Permeable Surfaces

A lot of drainage problems come from surfaces that don’t let water pass through – like concrete or asphalt. Water hits those areas and has nowhere to go, so it runs off and collects somewhere else.

Permeable surfaces fix that by letting water soak through instead of sitting on top.

Options include gravel, permeable pavers, and special grid systems that support weight while allowing drainage. 

These are great for driveways, patios, and walkways.

Instead of fighting the water, you’re working with it. It goes straight into the ground, which reduces runoff and helps prevent puddles from forming in the first place.

#8. Water-Loving Plants Or Trees

If your yard is just a little bit damp, you might be able to solve it with a trip to the nursery. 

Some trees are absolute “thirsty” machines. A single mature Willow tree or a Red Maple can drink hundreds of gallons of water in a single day. 

Planting these in the wet spots of your yard can act like a natural pump, pulling moisture out of the ground and releasing it into the air through their leaves.

It’s the most hands-off approach there is. 

You dig one hole, plant a tree, and let nature take care of the rest. Shrubs like Dogwood or Hydrangeas also love “wet feet” and can help stabilize the soil while drinking up the excess. 

It’s the ultimate win-win because you get a more beautiful yard and less mud to deal with.

Just be smart about placement. Some trees have aggressive roots, so you don’t want them too close to your home or underground utilities.

Bottom Line

French drains get a lot of attention, but they’re not your only option – and honestly, they’re not always the best fit for every yard.

If you’re dealing with minor pooling, something simple like a swale or rain garden might be all you need. If the issue is more serious, a dry well or proper grading can be a good alternative to French drains.

And if you care about how your yard looks, options like dry creek beds and permeable surfaces let you fix drainage without sacrificing style.

10 Great Dry Well Alternatives

Watching your backyard turn into a murky lake after a heavy downpour is super frustrating. 

Most people will tell you to just bury a dry well and call it a day, but that’s not always the best move, especially if your soil is packed with clay or you’re short on space.

The good news is that you have plenty of creative, beautiful, and highly effective ways to handle runoff without digging a massive hole in the ground.

In this post, we’ll show you 10 awesome dry well alternatives you could use.

#1 Rain Gardens

Rain gardens are one of our favorite alternatives because they manage water well and they look good doing it.

At its core, a rain garden is a shallow, landscaped depression that collects runoff from roofs, driveways, or patios. Instead of water rushing away, it flows into this planted area, slowly soaking into the ground while plants and soil filter out pollutants.

It’s practical and attractive at the same time. You can fill it with native grasses, perennials, or shrubs that love occasional soaking but don’t mind drying out in between storms.

Rain gardens work especially well when:

  • You have decent draining soil
  • You want something low-tech and low-maintenance
  • Curb appeal matters
  • You’re dealing with roof runoff

If your yard turns into a swamp after heavy rain, this can be a smart, natural solution that doesn’t involve burying more plastic underground.

Also Read: Geotextile Fabric For French Drain

#2 Bioretention Cells / Bioswales

Think of bioswales as rain gardens stretched out into a channel.

They’re designed to slow down water as it flows across a property, usually along driveways, parking areas, or roads. Instead of letting runoff rush downhill, a bioswale gently guides it through vegetation and engineered soil layers.

Bioretention cells are similar but usually more contained and structured. Both systems are built to capture sediment, filter pollutants, and allow water to infiltrate gradually.

These are common in urban areas, but homeowners can absolutely use them too. 

They’re especially useful if water flows across your property in a predictable direction and you want to intercept it before it becomes a problem.

#3 French Drains

French drains are a classic for a reason. They’re simple and effective.

It’s basically a gravel-filled trench with a perforated pipe inside. Water enters through the gravel, flows into the pipe, and gets redirected away from your foundation or low spots in your yard.

Alternatives To Dry Well

Unlike a dry well, which collects water in one place, a French drain moves it somewhere else. That’s a big difference.

They’re ideal when:

  • Water is pooling near your home’s foundation
  • You need to redirect runoff to a safer location
  • Soil doesn’t absorb quickly
  • You have a consistent drainage path

They don’t solve every stormwater issue, but when the goal is relocation rather than absorption, they shine.

Also Read: How To Unclog A French Drain

#4 Infiltration Trenches

An infiltration trench looks similar to a French drain but works a little differently.

Instead of piping water away, this system focuses on soaking it directly into the soil along the entire trench length. It’s filled with stone and sometimes wrapped in geotextile fabric to prevent clogging.

Water spreads out through the trench and slowly infiltrates into the surrounding ground. 

That makes it great for dispersing moderate runoff over a larger area instead of concentrating it in one pit like a dry well.

If your soil drains reasonably well but a single dry well would overflow during heavy rain, this dry well alternative can offer more capacity and flexibility.

#5 Permeable Pavement

Now we’re talking about preventing runoff before it even becomes a problem.

Permeable pavement allows water to pass through the surface instead of running off. Beneath the top layer sits a stone reservoir that temporarily stores water before it infiltrates into the soil.

You can install permeable pavers, porous asphalt, or pervious concrete. From the surface, it looks like a normal driveway or patio, but the difference is what’s happening underneath.

This works beautifully for:

  • Driveways
  • Walkways
  • Patios
  • Parking pads

It’s a bigger upfront investment compared to a dry well, but it addresses runoff at the source instead of trying to catch it later.

Dry Well Substitutes

#6 Green Roofs

Green roofs take stormwater management to the top of your house – literally.

These systems layer soil and vegetation over a waterproof membrane on your roof. Instead of rain immediately running into gutters, much of it gets absorbed and used by plants.

They’re more common in urban settings, but residential versions are becoming more popular. Aside from reducing runoff, they also help insulate your home and extend roof life.

This is definitely a higher-commitment solution. And structural considerations matter. 

But in the right situation, it’s impressive and effective.

Also Read: How Much Do Whole House Drainage Systems Cost?

#7 Rain Barrels & Cisterns

Rain barrels are one of the simplest dry well alternatives out there.

They collect water from your downspouts and store it for later use. That means less runoff hitting the ground during storms and free water for gardens once the sun comes out.

Cisterns are basically the bigger, more serious version. They can hold hundreds or even thousands of gallons.

These systems are great if you:

  • Want to reuse water for landscaping
  • Have manageable roof runoff
  • Prefer above-ground solutions
  • Don’t want to dig trenches

They won’t solve large-scale flooding on their own, but they reduce pressure on other drainage systems and help you put that rainwater to work.

#8 Constructed Wetlands

Constructed wetlands mimic natural wetland systems to manage and treat stormwater.

They’re designed basins filled with water-tolerant plants that filter runoff as it moves slowly through. Sediment settles out, pollutants break down, and cleaner water eventually exits the system.

These are typically used for larger properties or community-level drainage. 

Still, scaled-down versions can work on residential land with enough space.

They require thoughtful design and ongoing maintenance, but they create habitat and can become a beautiful landscape feature instead of a hidden drainage structure.

Also Read: French Drains In Cold Climates

#9 Swales With Check Dams

Sometimes the water is moving too fast for a simple ditch to handle, and that’s where check dams could be a good dry well substitute. 

A swale is just a shallow grassy channel, but when you add “check dams” (which are small barriers made of rocks or logs) you create a series of tiny pools. 

As the water flows down the channel, it hits a dam, pools up, and then spills over to the next section. 

This constant stopping and starting strips the water of its energy, prevents erosion, and gives it much more time to soak into the ground. 

It’s a very rustic, natural-looking solution that works wonders on sloped properties

#10 Stormwater Ponds / Detention Basins

Stormwater ponds are built to temporarily hold runoff and release it slowly over time. Detention basins stay dry most of the time and fill during storms, while retention ponds hold water permanently.

These are typically used for larger drainage areas like neighborhoods, commercial properties, or rural land with significant runoff.

They control peak flow and reduce downstream flooding risks. For individual homeowners, this may be more realistic on large properties or shared developments.

It’s not a small backyard solution, but in the right setting, it’s powerful and proven.

Bottom Line

There are a lot of dry well alternatives you can try if your soil drains slowly, your runoff volume is high, or you want something more visible and landscape-friendly.

Rain gardens and bioswales blend beauty with function. French drains and infiltration trenches manage water underground. Permeable pavement stops runoff at the surface. Rain barrels reuse water. Green roofs and wetlands handle it naturally. 

The best solution depends on your property layout, soil type, budget, and how much water you’re trying to manage.

Take a close look at how water moves across your yard during a heavy storm. That observation alone tells you a lot.

Then choose the option that fits your space and your goals.

Geotextile Fabric For French Drain (What It Is And Why It Matters)

If you’re planning a French drain or trying to figure out why an old one stopped working, geotextile fabric might not be the first thing on your radar. 

Most people focus on the pipe and the gravel, since those feel like the “important” parts. 

The fabric usually gets treated like an extra, or skipped entirely to save a little time or money.

That small layer, though, can make the difference between a drain that works for decades and one that slowly clogs up and fails. 

In this post, we’ll break down what geotextile fabric actually does in a French drain, why it matters so much, and when it’s something you really don’t want to leave out.

Why Is Geotextile Fabric Used In French Drains?

French drains fail for one main reason: clogging. 

Over time, fine soil particles migrate into the gravel bed and the perforated pipe. 

Once that happens, water movement slows down, then stops, and suddenly your “fix” isn’t fixing much at all.

Geotextile fabric creates a barrier between the surrounding soil and the drainage materials. Water can pass through easily, but sediment can’t. That simple separation is what gives a French drain its staying power.

Here’s what geotextile fabric helps with:

  • Keeps soil and silt out of the gravel and pipe
  • Maintains consistent water flow
  • Extends the life of the entire drain system

It also helps stabilize the trench itself. The fabric reduces soil movement, which means less settling and fewer low spots over time. 

That’s one of those benefits you don’t notice right away but really appreciate years later.

What Happens If You Skip The Fabric

Skipping the fabric doesn’t cause instant failure, which is why some people roll the dice. Early on, everything seems fine. Water drains. The yard dries out. Job done. 

Why Is Geotextile Fabric Used In French Drains

Then slowly, quietly, the drain starts filling with dirt.

Without fabric, soil works its way into the gravel bed every time it rains. Fine particles pack tightly, reducing the open space water needs to move. 

Eventually, the pipe clogs or the gravel turns into something closer to mud.

Common issues that pop up include:

  • Reduced drainage after a year or two
  • Standing water returning to the surface
  • Full system replacement instead of a simple fix

At that point, the cost of skipping fabric usually ends up higher than doing it right the first time.

Also Read: How To Unclog A French Drain

Types Of Geotextile Fabric For French Drains

The two main types of geotextile fabric for french drains are non-woven and woven fabrics. They look similar at a glance, but they behave very differently once buried.

Let us explain:

Non-Woven Fabric

Non-woven geotextile is the most common choice for French drains, and for good reason.

Non-woven fabric is made by needle-punching synthetic fibers together, which creates a material that looks a lot like felt. Because it isn’t “woven” in a traditional pattern, it has millions of tiny, random pores that allow water to pass through from any direction.

This type works especially well in clay-heavy or silty soils where clogging is a bigger risk. It’s flexible, easy to install, and forgiving if the trench isn’t perfectly shaped. 

It’s incredibly permeable, which is exactly what you want when you’re trying to move a lot of water away from your house during a thunderstorm.

For most residential drainage projects, non-woven fabric is the go-to option.

Woven Fabric

Woven geotextile looks more like a plastic mesh or tarp material.

You should generally avoid this for a French drain. 

Woven fabric looks like a series of plastic ribbons or a tarp that has been interlaced. It’s incredibly strong, which makes it perfect for putting under a new gravel driveway to keep the rocks from sinking into the mud, but it’s terrible at letting water through. 

If you use woven fabric in a drain, the water will often just sit on top of it like it’s a raincoat, defeating the entire purpose of your project.

It can work, but it’s usually not the best choice for typical yard drainage problems.

Best Fabric Weight For A French Drain

When you start shopping, you’ll see weights like 2 oz, 4 oz, or 8 oz. This refers to how much a square yard of the material weighs. 

For a standard residential French drain, a 4-ounce non-woven fabric is usually the “Goldilocks” choice. 

Also Read: How Much Does A French Drain Cost In Florida?

It’s thick enough that it won’t tear when you’re dumping heavy shovelfuls of rock onto it, but it’s thin enough that it won’t restrict the flow of water.

If you’re draining a yard, garden, or foundation perimeter, medium-weight non-woven fabric is almost always a safe and effective choice.

Types Of Geotextile Fabric For French Drains

How To Install Geotextile Fabric In A French Drain

Installation matters just as much as material choice. Even the best fabric won’t help if it’s installed incorrectly or left with gaps. The idea is to fully separate soil from gravel on all sides.

Here’s the basic process:

  1. Line the trench bottom and sides with fabric
  2. Add gravel, then place the perforated pipe
  3. Cover the pipe with more gravel
  4. Fold the fabric over the top before backfilling

That final step is the most important. Wrapping the gravel creates a complete barrier, almost like sealing everything in a burrito. Leaving the top open is one of the most common mistakes and defeats the whole purpose of using fabric in the first place.

Take your time during installation. 

A few extra minutes adjusting the fabric now can save years of headaches later.

How Long Do Geotextile Fabric Lasts Underground?

High-quality geotextile fabric is designed to last decades underground. 

It’s resistant to rot, mold, and most chemicals found in soil. Once buried and protected from sunlight, degradation happens very slowly.

In normal residential conditions, geotextile fabric can easily last 25 to 50 years. 

Often, it outlasts the pipe itself!

That said, the longevity depends on soil type, water flow, and installation quality, but fabric failure is rarely the weak link in a French drain system.

That durability is another reason skipping it doesn’t make much sense. 

It’s a one-time investment that keeps doing its job quietly for years.

Also Read: Sump Pump Discharge Ideas

Do You Always Need Geotextile Fabric?

In most cases, yes. 

Especially in clay, loam, or mixed soils, fabric is essential for long-term performance. These soils carry fine particles that clog drains quickly without proper filtration.

There are rare situations where fabric might be optional, like in very coarse, clean sand with excellent natural drainage. Even then, many professionals still use it because soil conditions change over time. 

What drains well today may not behave the same after years of compaction and runoff.

If you’re already digging a trench and buying gravel and pipe, adding fabric is a small extra step that offers big protection.

Bottom Line

Building a French drain is a lot of work, and it’s tempting to cut corners when you’re three hours into digging a trench in the heat. 

But if you take the time to pick out a quality 4 ounce non-woven geotextile fabric and wrap your system correctly, you’re ensuring that all that hard work actually pays off. 

It keeps the mud out, keeps the water moving, and keeps your basement or crawlspace dry. 

Just remember: non-woven is the way to go, and skipping the fabric is the fastest way to turn a weekend project into a recurring nightmare down the road.

What Size Sump Pump Do I Need? (Guide)

Picking a sump pump isn’t something most people think about until their basement suddenly looks like a kiddie pool. 

At that point, it’s usually a little too late to start Googling horsepower ratings. 

The truth is, getting the size right isn’t complicated. You just need to know a few basics, do a quick test or two, and match the pump to your home’s actual needs.

In this post, we’ll show you how to calculate the sump pump size you need.

Common Sump Pump Sizes

First things first, there are a few standard sizes for sump pumps, and you’ll mostly find them categorized by horsepower (HP). The most common ones are:

  • 1/3 HP pumps
  • 1/2 HP pumps
  • 3/4 HP pumps

1/3 HP is the standard for most homes. It handles light to moderate water flow and works great in average-sized basements with a standard discharge line.

1/2 HP is a step up when the pit fills a bit faster, or when your discharge line is longer. It moves more water and can handle higher lift.

3/4 HP and above are the heavy hitters. They’re built for deep basements, very high water tables, or homes that deal with frequent, heavy storms.

For many homeowners, 1/3 HP is enough

But once your pit starts filling quickly during rain or your discharge line has a few twists and turns, bumping up to 1/2 HP is usually a smarter move. 

Common Sump Pump Sizes

Also Read: Sump Pump Replacement Costs

What Size Sump Pump Do I Need?

To figure out the size of pump you need, you’ve got to think about a few different things. 

These aren’t just random details; they’re all going to play a role in making sure your pump works as efficiently as possible:

#1 Consider How Much Water You’re Dealing With

This is the biggest factor. 

If your sump pit fills slowly and steadily during rain, you can probably stick with a 1/3 HP pump. But if it fills up fast, you’ll need something stronger to keep up.

There’s a quick way to figure this out without fancy tools: 

Wait for a rainy day or use a garden hose to fill your pit manually. Watch the water rise for 60 seconds. Measure how many inches it goes up. Multiply that by the pit’s diameter to estimate gallons per minute. Then multiply by 60 to get gallons per hour.

Once you have that number, pick a pump that can handle a little more than your highest inflow rate. 

Giving yourself a small cushion helps during sudden downpours.

Also keep in mind how often the pump will cycle. A smaller pump running constantly isn’t ideal. A slightly larger pump that cycles on less often may last longer and keep up more.

Also Read: Sump Pump Float Stuck

#2 Factor In Your Sump Pit Size

Pit size matters more than most people think. 

If your pit is on the small side, there’s less water stored between pump cycles. That means the pump may turn on and off more frequently, which wears it out faster. 

A bigger pit gives the float switch more room to work and keeps the pump from short cycling.

Most pits are around 18 to 24 inches wide. A 1/3 HP pump works well in that range for average inflow. If your pit is larger or deeper, a more powerful pump can move bigger volumes of water in fewer cycles. 

That said, installing a huge pump in a tiny pit can cause problems too, like it may empty the pit so fast that it turns on and off constantly.

A good fit keeps things balanced and strong enough to move the water out but not so aggressive that the pump never rests.

#3 Think About Your Discharge Line

Your discharge setup plays a bigger role than you might expect. 

The pump doesn’t just move water vertically; it also has to push it through a length of pipe and around any bends. Every extra elbow or long horizontal run adds resistance.

A standard system with a short vertical rise and a straight shot outside is easy. But if your discharge line runs a long distance or climbs several feet before exiting, you’ll need a stronger pump to maintain flow.

The typical discharge pipe is 1½ inches wide, and a check valve is a must. 

Without it, water flows back into the pit when the pump shuts off, forcing it to move the same water twice. That extra strain adds up fast.

What Size Sump Pump To Get

Also Check Out Our: Sump Pump Services In Central Florida

#4 Match The Pump Size To Your Needs

Once you’ve looked at water volume, pit size, and discharge setup, the right size usually becomes obvious.

For example, say you have a standard pit, moderate inflow, and a short discharge line. A 1/3 HP pump is perfect. But if the pit fills quickly during heavy rain and your discharge line runs 30 feet with a few bends, 1/2 HP is a safer bet.

If you’ve got a deep basement and your pump has to push water vertically for 10 feet or more, a 3/4 HP pump might be worth it. 

You have to match the pump’s capacity to the actual work it needs to do, and not to go overboard just for the sake of it.

#5 When To Upgrade Or Go Bigger

So, you’ve got a sump pump that seems to work fine, but there are times when you should consider going bigger. If you notice your pump struggling, it might be a sign that it’s time to upgrade. 

Some signs to look out for include:

  • The pump runs constantly or for long periods.
  • Your basement still gets damp or flooded after a heavy rain.
  • The pump doesn’t seem to move water fast enough, or it gets clogged frequently.

If any of these sound familiar, it could mean your pump isn’t up to the task anymore. 

Upgrading to a more powerful model, like moving from 1/3 HP to 1/2 HP or 3/4 HP, might make a big difference.

#6 Don’t Forget The Extra Details

The horsepower is only part of the equation. 

A few small details can make a huge difference in how well your system works.

For starters, stick with a quality brand. Cheaper pumps might look tempting, but they tend to burn out quicker. Installing a reliable check valve is essential too. It prevents water from flowing backward into the pit after each cycle.

If your area gets frequent storms or you travel often, consider a backup sump pump or battery-powered system. 

A power outage during a storm is one of the most common ways basements flood, and a backup can save you thousands in repairs.

Finally, test your system every so often. 

Pour a few buckets of water into the pit and make sure the pump kicks on smoothly and discharges properly. A quick check now and then keeps surprises away.

Bottom Line

Picking the right sump pump size doesn’t need to be a guessing game. 

A little measuring, a quick look at your pit, and a check of your discharge line give you everything you need to make a smart choice.

For most homes, a 1/3 HP pump does the job just fine. If your pit fills quickly or your discharge setup is more demanding, a 1/2 HP model is usually the next step up. 

Bigger pumps have their place but aren’t automatically better.

8 Sump Pump Discharge Ideas

If your sump pump’s doing its job, that’s great.

But the real question is, where’s all that water going once it’s pumped out? 

If it just dumps near your foundation, it can sneak right back in, flood parts of your yard, or cause some sneaky damage over time. 

The good news is, there are plenty of smart ways to direct that water so it stays far away from your home and doesn’t create new problems in the process.

In this post, we’ll walk through some simple, practical sump pump discharge ideas you can use to keep your basement dry, your yard looking neat, and your foundation safe.

#1 Extend The Discharge Pipe Away From The House

This is hands down the easiest and most common solution. 

It doesn’t require fancy materials or complex setups. You just attach an extension pipe to your sump pump’s discharge line and run it out into the yard.

Ideally, the pipe should stretch at least 10 to 20 feet away from your foundation. This gives the water enough distance to soak into the ground without circling back toward your basement. 

If your yard slopes away from the house, even better – it helps gravity do most of the work.

You can use PVC or flexible corrugated piping, depending on what you have on hand. Burying it just below the surface keeps things neat and prevents the line from getting damaged by lawn mowers. 

It’s a simple, low-cost option that works well for most homes.

Ideas for sump pump discharging

Also Read: Sump Pump Float Stuck

#2 Use A Pop-Up Emitter

A pop-up emitter is a clever little device that stays flush with your lawn when not in use and pops open when water starts flowing through the discharge line.

The water pushes up the cap and flows out into the yard, then the cap closes once the flow stops. The best part is it keeps your yard looking clean and uncluttered – no pipes sticking out everywhere.

You can place it in a spot where the ground slopes gently.

This allows the water to spread out and absorb naturally.

It’s great for areas where you don’t want standing water or erosion near the house.

#3 Create A Dry Well

If your yard doesn’t have a good place to send water or you just prefer a contained system, a dry well is a fantastic sump pump discharge idea. 

When the sump pump discharges, the water collects in the dry well and slowly seeps into the surrounding soil.

This setup is especially useful for flat yards where water tends to pool. It also helps reduce runoff, which is a bonus if you’re aiming for a more eco-friendly drainage system. 

Once it’s installed, you barely notice it’s there.

Also Read: How Deep Should A French Drain Be?

#4 Install A French Drain

A French drain is a slightly more involved project but super effective. 

It’s basically a sloped trench filled with gravel and a perforated pipe. The discharge line connects to it, and the water gets distributed underground along the trench.

This method is great for redirecting larger amounts of water away from your home without causing erosion or muddy patches on the surface. It also works nicely if you want the discharge to end up in a specific low-lying area of your property. 

With the right slope, the system runs on its own without pumps or moving parts. 

Once installed, it blends right into the landscape.

#5 Route To A Rain Garden

A rain garden is not just functional, it can actually make your yard look beautiful. 

Instead of letting that water run off into the street, you can direct it into a shallow, landscaped basin filled with native plants that love moisture.

sump pump discharge

The plants and soil work together to absorb and filter the water naturally. It’s a win-win: you solve drainage issues and boost your yard’s aesthetics at the same time. 

Plus, rain gardens help reduce runoff that can overwhelm storm drains, making them a smart environmental choice too.

Also Read: Sump Pump Replacement Cost

#6 Tie Into Storm Sewers (If Allowed)

In some neighborhoods, you can legally connect your sump pump discharge to the municipal storm sewer system.

This gives you a clean, permanent way to get water off your property fast.

Before going this route, it’s important to check your local regulations. Many cities don’t allow this, and some require specific permits or backflow prevention devices. 

If it’s approved in your area, it can be one of the most effective and maintenance-free sump pump discharge ideas. The water goes straight into the storm system, and you don’t have to worry about landscaping or puddles.

#7 Use A Downspout Adapter

If your gutter system already directs water far away from your foundation, you can tie the sump pump discharge into that same line using a downspout adapter. 

This way, both systems work together to keep water flowing away from your house.

Just make sure the pipes are sized properly to handle the extra volume, especially during heavy rains. The connection should be secure and watertight to avoid leaks. 

It’s a simple way to use existing infrastructure and keep your yard clutter-free.

#8 Add A Splash Block Or Rock Bed At The End

This is another simple sump pump discharge idea.

If you want an easy above-ground option, you can finish your discharge line with a concrete splash block or a decorative rock bed. 

This helps disperse the water evenly and reduces soil erosion where the pipe ends.

A splash block directs the flow outward, preventing the water from digging trenches in your lawn. A rock bed works similarly but looks a bit more natural. 

You can even use both for extra protection. It’s a quick fix that doesn’t take much time or money but still makes a big difference.

Bottom Line

Your sump pump does a lot of heavy lifting to keep your basement dry, but where that water goes after it’s pumped out is just as important. 

A good discharge setup protects your foundation, prevents yard flooding, and saves you from future headaches. You’ve got plenty of options – some simple, some a bit more involved. 

Here’s a quick recap to help you decide:

  • Extend the pipe to send water farther from your foundation.
  • Use hidden solutions like pop-up emitters, dry wells, or French drains for a cleaner look.
  • Go eco-friendly with a rain garden or integrate with existing systems like storm sewers or downspouts.

Each yard is a little different, so the best approach depends on your layout, soil type, and local rules. With the right setup, you can keep your basement dry, protect your landscaping, and make sure that water ends up exactly where it should.

How Deep Should A French Drain Be? (Guide)

If you’ve ever dealt with a soggy lawn or water creeping toward your foundation, you’ve probably come across the idea of installing a French drain. 

It’s one of those simple but genius fixes for stubborn drainage issues.

But once you decide to tackle it, the big question pops up: how deep should you actually dig? 

In this guide, we’ll walk through how deep a french drain should be, what changes based on your situation, and the common mistakes to avoid so your French drain does its job right.

How Deep Should A French Drain Be?

A French drain usually needs to be 18 to 24 inches deep for general yard drainage. That’s deep enough to collect surface water and shallow groundwater before it causes soggy spots.

If you’re working near your house, you may need to go deeper, sometimes closer to 36 inches. 

The width matters too. 

A trench that’s 8 to 12 inches wide with a perforated pipe in the bottom usually does the trick. 

And don’t forget the slope. The pipe needs to tilt slightly so the water can move which is about an inch drop for every 8 to 10 feet is the sweet spot.

That said, you need to create a pathway where water can travel easily and away from the area you’re trying to protect. That means matching your depth to your exact situation, not just following a single measurement.

French Drain Depth

Also Read: Can You Do A French Drain Without Pipe?

French Drain Depth By Purpose

The depth you dig really depends on what problem you’re solving. 

A shallow drain can handle soggy patches in the yard, but if you’re protecting a basement or a driveway, you’ll usually need to go deeper.

Here’s a quick breakdown:

PurposeRecommended DepthWhy It Works
Yard drainage18 – 24 inchesDeep enough to catch surface runoff and shallow groundwater.
Protecting foundations/basements24 – 36 inches (sometimes down to footing)Keeps water from pooling against the foundation and leaking into basements.
Driveways & retaining walls24 – 36 inchesHandles heavy runoff and relieves pressure behind hardscapes.
Garden beds/landscape features12 – 18 inchesPrevents standing water without disturbing plant roots too much.

Factors That Affect How Deep A French Drain Should Be

The guidelines above give you a starting point, but other factors can shift things one way or the other. So before you dig, it’s worth thinking about your yard and environment:

Also Read: How Much Do Whole House Drainage Systems Cost?

#1 Soil Type And Absorption Rate

Soil type plays a bigger role than most people realize. 

Sandy soil drains quickly, so water moves through it easily, which means your French drain doesn’t have to be super deep. 

Clay soil, on the other hand, holds water like a sponge. If your yard is clay-heavy, a shallow trench won’t cut it, you’ll need a deeper setup and more gravel to give water somewhere to go. 

Loamy soil falls somewhere in between, offering decent drainage without too much extra work. 

Knowing your soil type can save you time and guesswork. A simple trick is to dig a small hole, fill it with water, and see how fast it drains. That gives you a good idea of what your drain will need to handle.

#2 Slope Of The Yard

Slope is all about helping gravity do the work. 

Water doesn’t flow uphill, obviously, so if your yard is flat, you’ll need to plan a slightly deeper trench or adjust the layout to create a steady downhill path for the water. 

Even a small slope (just an inch drop for every 8 to 10 feet of pipe) can make a huge difference. 

If your yard already has a natural grade, you’re in luck. You can often follow that slope without digging extra deep, making installation easier. 

Just make sure the water has a clear path to an exit point, like a lower part of the yard, storm drain, or dry well.

#3 Local Climate And Rainfall Levels

Your local weather really affects how deep your French drain needs to be. 

If you live in a rainy region, shallow drains can quickly become overwhelmed, leaving you with puddles and soggy soil. In these cases, a deeper trench with more gravel helps handle the extra water and keeps the system from backing up. 

Factors That Affect How Deep A French Drain Should Be

Also Read: Can You Drive Over A French Drain?

But if you’re in a drier climate with occasional rain, you can get away with a shallower trench. 

Think about how much water your drain will need to handle during heavy rainstorms or seasonal downpours. Planning for the worst-case scenario is a smart move.

#4 Building Codes And HOA Requirements

Some towns, cities, or homeowners’ associations have rules about drainage systems. 

They may set limits on trench depth, specify where water can be discharged, or even dictate the materials you use. Ignoring these rules can lead to fines or having to redo the work. 

So before you start digging, check your local building codes and HOA requirements. 

A quick phone call or visit to the local permit office can save you headaches later.  

Mistakes To Avoid When Planning French Drains

French drains are simple in concept, but a few mistakes can ruin the whole setup. 

A shallow trench is probably the biggest one. 

If it’s not deep enough, it won’t catch the water and you’ll be right back where you started. 

Going too deep can also be a problem as it adds extra labor and cost without much benefit if the water you’re dealing with is mostly near the surface.

Also Read: How Much Does A French Drain Cost In Florida?

Another mistake is forgetting about slope. Even a perfectly dug trench won’t help if water just sits in the pipe. You want that steady drop so gravity keeps everything moving.

Skipping landscape fabric is another common slip-up. Without it, soil and roots can clog the gravel and pipe.

And don’t forget about the outlet. The drain has to end somewhere, like a dry well, storm drain, or lower part of your yard. If there’s no proper exit, the system won’t work.

Bottom Line

A French drain should be 18 to 24 inches deep. If you’re protecting your foundation, driveways, or walls, go a bit deeper around 24 to 36 inches. 

The exact depth depends on your soil, slope, climate, and any local rules.

The good news is you don’t need to overthink it. Focus on creating a clear path with the right slope and a solid outlet. That’s really the heart of a good French drain. 

If you take the time to plan it out, you’ll end up with a simple, low-maintenance fix that keeps water from becoming a headache. 

And once it’s in place, you’ll wonder why you didn’t do it sooner.

Sump Pump Replacement Cost In Florida

So, your sump pump’s giving up, and now you’re thinking about replacing it. 

First off, don’t worry, it’s super common in places like Florida where the water table is high, and you can have heavy rains pretty often. 

But how much does it actually cost to get a new sump pump installed?

In this post, we’ll give you a quick rundown of how much sump pump replacement costs and the factors that affect the final bill. Plus, we’ll also go over our replacement prices.

How Much Does Sump Pump Replacement Cost?

Replacing a sump pump will set you back anywhere between $400 and $1,200in Florida. This price includes both the cost of the pump itself and the labor to install it. 

Of course, the total cost can vary widely, depending on what kind of pump you’re getting and what’s involved in the job.

Here’s a quick breakdown:

Job TypeAvg Cost
Basic replacement (pump only)$400 – $700Swapping out an existing pump with minimal labor.
Standard replacement (pump + labor)$800 – $1,200Most homeowners fall into this range.
High-end replacement$1,500 – $2,500+Includes digging a new pit, concrete cutting, or adding battery backup/alarm.
Pedestal pump replacement$400 – $900Cheaper option but less durable than submersible.
Submersible pump replacement$700 – $1,500Quieter, longer-lasting, handles higher volumes of water.

If your setup is straightforward and you’re just swapping a worn-out pump for a new one, you’ll likely land near the lower end. If your pump is in a tricky spot or you want added protection, expect to pay more.

How Much Does Sump Pump Replacement Cost

Check Out Our: Sump Pump Installations In Central Florida

What Affects The Cost Of Sump Pump Replacements?

The price tag for replacing a sump pump isn’t set in stone. A number of things can impact how much you’ll pay, and it all comes down to what you need and where you’re at. 

Here’s a quick breakdown of the biggest factors:

#1 Type Of Pump

There are several types of sump pumps out there, and the type you choose is one of the biggest price drivers. The two main types are submersible pumps and pedestal pumps.

Submersible pumps are placed underwater inside the sump basin. They tend to be quieter and more powerful, but they also cost more. 

Expect to pay a bit more for this type.

Pedestal pumps sit above the sump pit, and they’re typically easier to maintain. They’re also cheaper, but they’re usually not as powerful or quiet as submersible ones.

Then, you’ve got specialty pumps like battery backup systems, which can raise the price. These are great if you live somewhere prone to power outages. They make sure your pump still works even if the electricity goes out.

#2 Capacity / Power

The power and capacity of the pump also affect the cost. 

In Florida, you need a pump that can handle heavy rainfall and possibly even floodwaters. Larger, more powerful pumps that can move more water per minute will usually cost more.

For example, smaller pumps that can move about 1,000 gallons of water per hour (GPH) might run you a few hundred dollars. 

But if you go for something with more power, like a pump that moves 3,000+ GPH or has additional features, you’ll see your costs climb. 

It’s a tradeoff: do you need high power, or is a smaller, less expensive pump enough for your needs?

#3 Accessories Or Backup Features

Now, if you’re adding any extra accessories to your sump pump, the cost will go up. 

Backup systems are popular, especially in areas where power outages are common. A battery backup or generator system will help your sump pump keep running during a blackout.

Other add-ons could include things like:

  • Water alarms that alert you if water levels rise.
  • Float switches, which monitor water levels to make sure the pump turns on when it should.

These accessories aren’t always necessary, but they can provide peace of mind, especially if you’re worried about flooding or losing power during storms.

Also Read: Sump Pump Float Stuck

#4 Existing Setup

The condition of your current setup can also affect the sump pump replacement cost.  

If your sump pump is buried in a tricky spot or the existing pit is too small, you might need extra work done. Sometimes, contractors need to dig a new pit or make adjustments to fit the new pump.

If you’ve got an old system, the pit might be filled with debris or mud, which could also add to the time and cost of the job. 

What Affects The Cost Of Sump Pump Replacements

In some cases, the existing wiring may not be up to code, requiring electrical work.

#5 Labor Cost In Your Area

Labor is a big part of the overall cost. 

In Florida, labor rates vary based on location. Generally speaking, larger cities and areas with a higher cost of living, like Miami or Orlando, will have higher labor rates. 

But if you’re in a smaller town or rural area, the rates will likely be lower.

Apart from that, the skill level of the technician can also influence the cost. You might find some DIY-friendly options, but if you want the job done right (and avoid any issues later on), it’s a good idea to hire a professional. 

Expect to pay anywhere from $50 to $150 per hour for the job, depending on your location and the complexity of the installation.

Also Read: Sump Pump Installation Cost In Florida

#6 Accessibility

How easy (or hard) it is to access your sump pump is another factor in pricing. 

If your sump pump is tucked away in a crawl space or a difficult-to-reach area, it might take longer to replace and could cost more. 

The easier it is for the technician to get to the pump, the less you’ll pay for labor.

If your pump’s in a tricky spot, you may need to pay for some additional time and effort to move things around, or the contractor may need to use special equipment to get the job done.

That increases sump pump replacement costs.

#7 Permits

In some areas, you might need a permit to install or replace a sump pump. This isn’t always the case in Florida, it’s something to keep in mind. 

Permits add extra costs and may require inspections after the work is done. 

So be sure to check with your local municipality to find out if you’ll need a permit, and factor in the cost of that before moving forward with the replacement.

Bottom Line

Sump pump replacement costs between $400 and $1,200 for the whole process, including labor and materials in Florida. 

The exact price really depends on what you’re looking for. 

A basic replacement might only cost a few hundred bucks, but if you go for something more powerful with a backup system or other accessories, you could be looking at a higher price.

Be sure to get a few quotes from local contractors to get a sense of what’s fair in your area.

In the end, it’s an investment in keeping your home dry and safe.

How Much Do Whole House Drainage Systems Cost?

If you’ve been dealing with water pooling around your house, damp spots in the basement, or soggy patches in your yard, you’ve probably looked into drainage solutions. 

The big question most homeowners ask is how much does a house drainage system cost? 

The short answer is that it depends on the type of system, your home size, soil conditions, and even where you live.

The long answer is what we’re going to cover here, so you’ll have a clear picture of what might be ahead if you decide to take on this project.

Whole House Drainage Systems Costs

Whole house drainage systems can range anywhere from $5000 for simple setups to $25,000 for bigger, more complex installs.

On the low end, you might see quotes around $4,000 to $6,000 for a small yard drainage project or a basic French drain. On the higher side, you could be looking at $25,000 or more if you need a full perimeter system with sump pumps, waterproofing, and heavy excavation.

Here’s a quick breakdown:

  • Basic yard drainage (surface water only): $3,000 – $8,000
  • Interior French drain with sump pump: $8,000 – $15,000
  • Exterior perimeter drain with restoration: $10,000 – $20,000
  • Full whole-house system (interior + exterior + pumps + coatings): $20,000 – $30,000+

The big reason for the wide range is that not all homes have the same drainage issues. 

One person might just need to redirect rainwater away from their foundation, while someone else has a basement that floods every time there’s a storm. 

House Drainage Systems Costs

Also Read: Sump Pump Installation Costs

Naturally, those situations call for very different fixes and budgets.

Our Whole House Drainage System Prices

Our full-home drainage systems generally range from $5,000 up to $25,000. This is a complete solution designed to keep water away from your foundation and protect your property long-term.

Here’s what’s included in our drainage system installations:

  • Full excavation and installation of the drainage system
  • High-quality drainage pipe and fittings
  • Proper grading to direct water flow
  • Rock backfill and premium drainage fabric for durability
  • Clean-up and restoration of the work area

This gives you a turnkey system that’s built to last and keep your home protected from water issues.

What Affects The Cost Of A Whole House Drainage System?

Here are some of the biggest things that will affect your whole house drainage system cost:

#1. Type Of System Installed

The type of drainage system makes the biggest impact. 

A simple French drain that’s dug in the yard costs a lot less than an interior basement drain with sump pumps and waterproof coatings. 

Exterior drains are often less disruptive but can involve heavy equipment and landscaping restoration. Interior drains may mean tearing up concrete, adding pumps, and putting everything back together. Each type comes with its own set of costs.

For example, a yard French drain might only run you $10 to $35 per linear foot, while an interior perimeter drain can cost $40 to $85 per foot. 

When you add it all up, that’s thousands of dollars’ difference depending on which route you go.

Also Read: How Much Does A French Drain Cost In Florida?

#2. Home Size

The bigger the house, the bigger the cost of whole house drainage systems. 

Why? Because larger homes often mean more linear feet of pipe, more trenching, and more time for the crew. 

For example, a small ranch with 100 feet of drain needed will obviously cost less than a large two-story with 250 feet around the foundation. 

If your yard is wide and flat, you might also need extra channels or dry wells to make the system work well.

#3. Soil Conditions

Soil conditions also affect how much a whole house drainage system costs. 

If you live in an area with soft sandy soil, the digging goes quickly and the water drains more easily. That usually lowers the cost. 

On the other hand, clay soil holds onto water and requires more gravel or deeper trenches to get results. Rocky soil is another headache since it slows down excavation and wears out equipment. 

What Affects The Cost Of A Whole House Drainage System

All of that means extra labor, which leads to higher costs.

Think of it like this: contractors can dig a trench in sandy soil in a couple of hours. The same trench in packed clay might take twice as long. You’re paying for that time.

Also Read: Yard Drainage Solutions: DIY Vs. Hiring Pros

#4. Water Problems

The more severe your water problems, the more complex your drainage system has to be. 

A yard that gets soggy for a day or two after a storm might only need surface drains or a shallow French drain. That’s a relatively small job.

But if you’ve got standing water around the foundation, or a basement that floods regularly, your contractor will recommend a full perimeter system inside or outside the basement walls. 

These setups might include sump pumps, backup pumps, moisture barriers, and even wall coatings. 

Every layer adds thousands to the total cost.

#5. Interior Vs. Exterior Work

Interior and exterior drainage systems are both effective, but they affect costs in different ways. 

Interior systems require breaking up basement floors, laying drain tile, and then re-pouring concrete. It’s messy and labor-intensive, but it doesn’t disturb your yard.

Exterior systems often involve digging around the foundation, which may require removing decks, patios, or landscaping. 

That means you’ll pay for excavation and then pay again to restore everything after. 

So, depending on the setup of your property, one option might be more practical, but also more expensive.

Also Read: Ways to Waterproof An Exterior Wall

#6. Labor Rates

Labor rates vary wildly across the country, and they make a huge difference in final pricing. 

In smaller towns or rural areas, you might find rates as low as $50 per hour for excavation and drainage crews. In metro areas, $100 – $150 per hour isn’t unusual. 

On a project that takes 100 – 200 hours, that’s a $5K – $10K swing just based on location.

It’s not only about hourly rates, though. Crew size matters too. A two-man crew will take longer than a six-man crew, and if your soil or foundation makes work tricky, the job stretches out.  

#7. Permits And Local Codes

Permits can feel like small line items, but they add up. 

Simple residential drainage permits might only be $200 – $500. But in cities with stricter stormwater management rules, permits can easily cross $1,500 – $2,000 once inspections are included.

Then there are codes. Some municipalities won’t allow you to discharge water into the street or storm drains, so you may need dry wells or underground dispersal systems instead. Others require specific types of pipe, like rigid PVC instead of flexible corrugated. 

That bumps up material costs. 

Local inspectors may also require staged inspections, which means scheduling delays and added labor.

Bottom Line

Whole house drainage systems aren’t cheap, but they’ll save you a lot of money down the road. 

If you’re only dealing with minor surface water, expect to spend a few thousand dollars. For more serious basement or foundation problems, $10K – $20K is common. 

And if you’re looking at a full house drainage system with both interior and exterior solutions, plus pumps and waterproofing, $20K – $30K isn’t unusual.

The smartest step is to get a few quotes from local contractors. 

Ask them to explain the type of system they’re recommending, how it addresses your specific water problems, and what’s included in the cost.